Would you like to add a GUI for your MCU projects but find LCD screens too small? Want to interface these projects to your PC’s computer screens? Read this article about connecting your Arduino to a Python Graphical Interface on your PC.
Introduction
Some users may find projects having a GUI (Graphical User Interface) more appealing than those that don’t have one. Similarly, as the user interface becomes more prominent and accessible, so does its interaction rate with its users. Here, as an example, an MCU with a sensor will be interfaced with a PC running Python to make the project more comfortable to interact with.
Download Thonny IDE and Install a Graphics Library
The main component of interest for an interactive GUI on your PC is the Python programming language. Python is a high-level programming language that can accomplish several tasks. One of these tasks is data visualization and graphics.
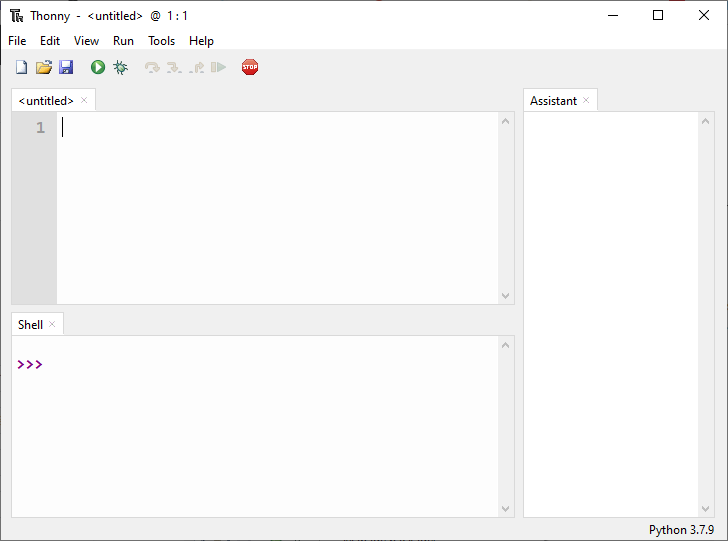
With this, install a simple Python IDE on your PC, such as Thonny. Previously, Python was also used in other projects, such as Interfacing the Arduino Serial Monitor with Python and Controlling Arduino by Voice in Python, so you may want to check them out. Specifically, these projects installed the pyserial library that will also be used in this current project.
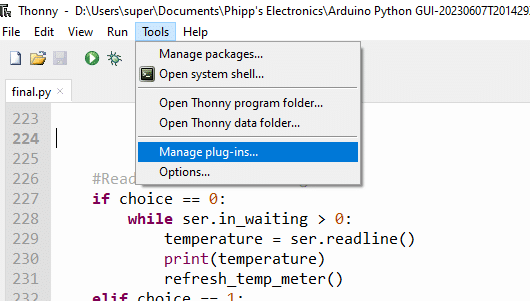
Install the graphics.py library from the Tools -> Manage plug-ins.
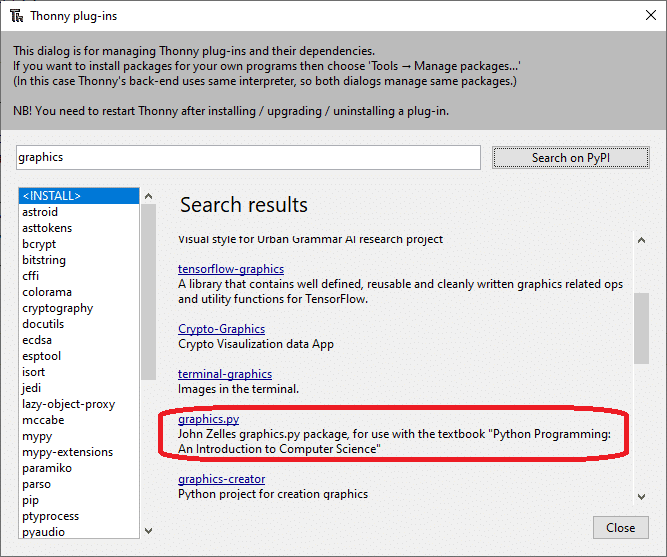
Search for graphics and install the graphics.py plug-in.
Gather Your MCU and Sensor.
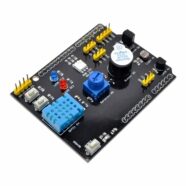
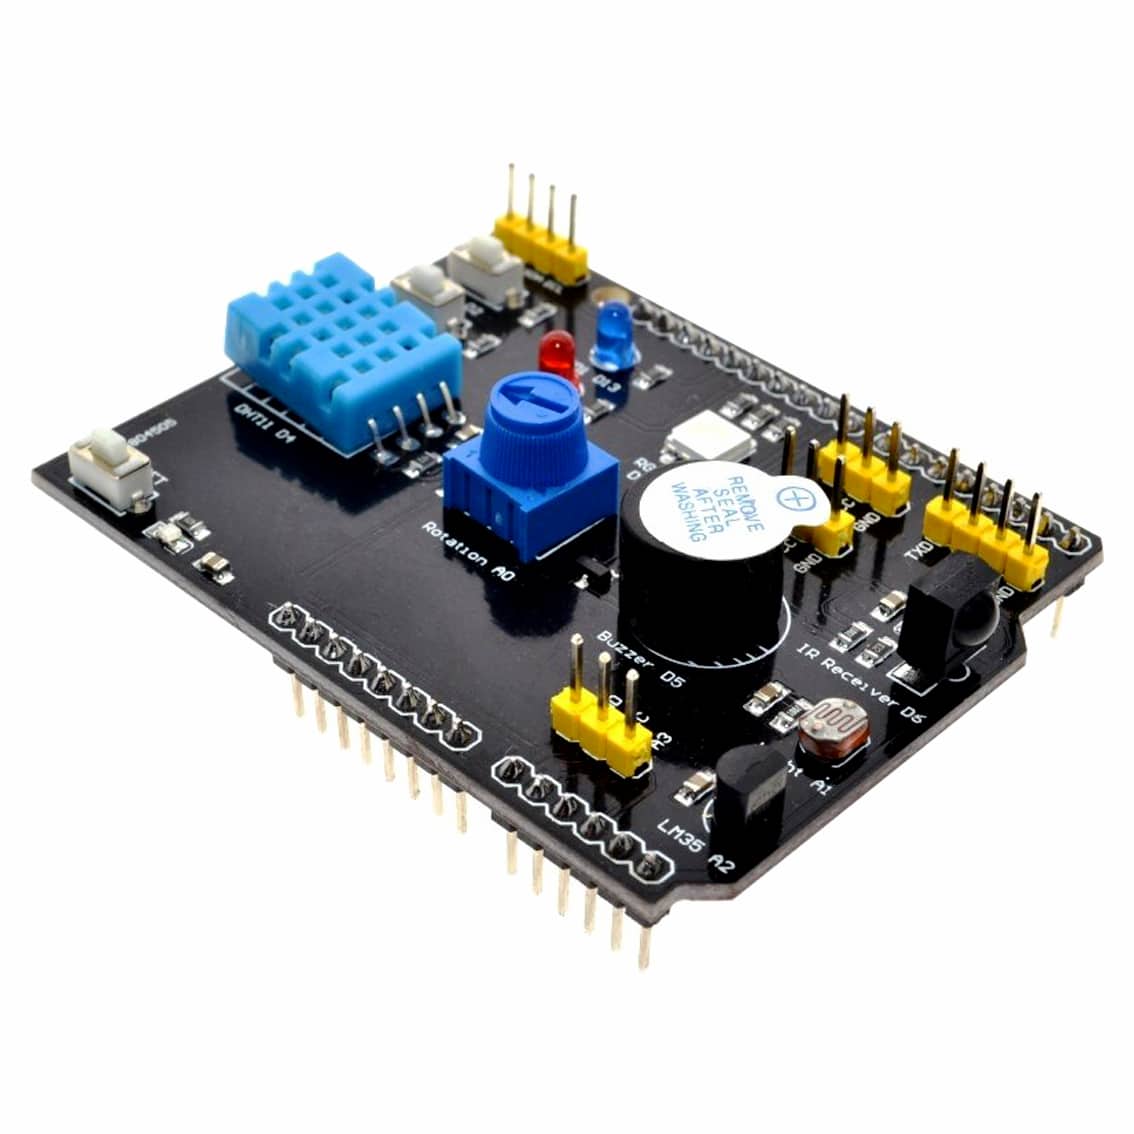
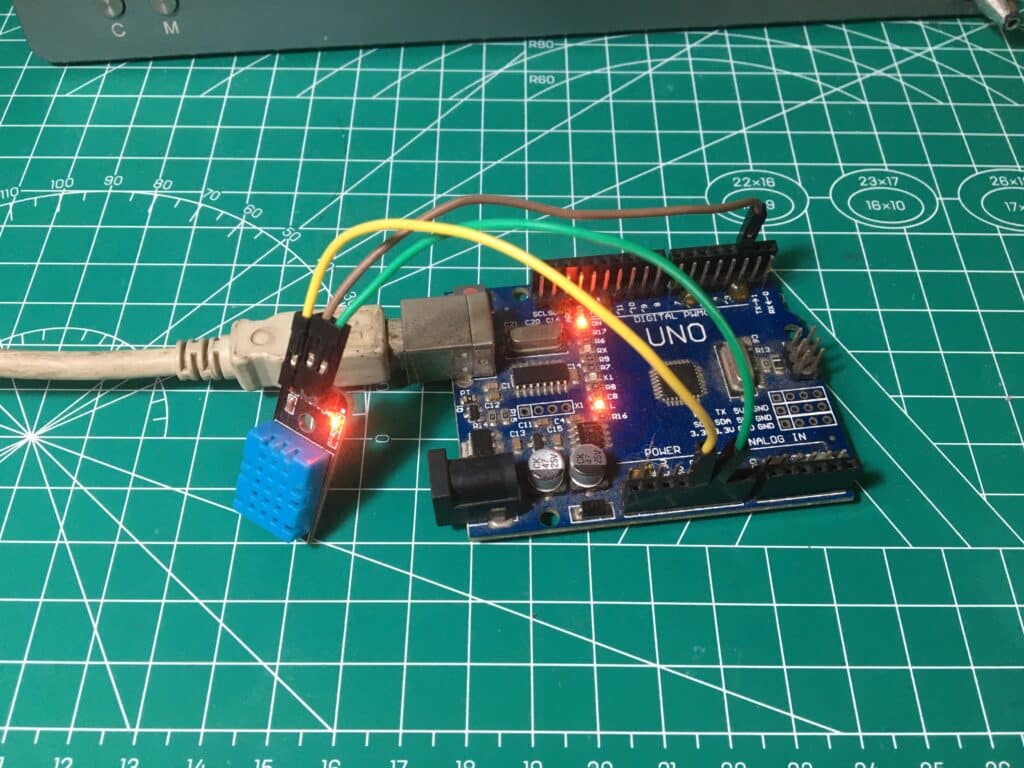
To illustrate the concept of this MCU PC-based GUI using Python, an Arduino UNO will be used to gather data from a sensor. The sensor is a DHT11 temperature and humidity sensor. The user can visually select a temperature or humidity reading by clicking a button on the GUI. Please check Displaying Temperature and Humidity on an OLED screen to review how to use the DHT11 on Arduino. This UNO interfaces to a PC via its USB port, acting as a virtual COM port device while the PC runs the Thonny Python IDE. The DHT11’s 1-wire interface is connected to pin 2 of the Arduino.
Write Code for your GUI on the PC in Python
Here is the code for the Python IDE. You can go to this hands-on Python tutorial to learn more about using the graphics library.
					''' Temperature and Humidity reading from an Arduino MCU
displayed on a PC using Python IDE'''

from graphics import *
import serial

ser = serial.Serial('COM16', 9600, timeout=0)

WIDTH, HEIGHT = 640, 480

win = GraphWin("Temp/Humidity", WIDTH, HEIGHT)

def draw_temp_meter():
    #temperature
    T1 = Circle(Point(140,200), 25) # set center and radius
    T1.setFill("yellow")
    T1.draw(win)
    labelT1 = Text(Point(140, 200), '26')
    labelT1.draw(win)

    T2 = Circle(Point(200,200), 25) # set center and radius
    T2.setFill("yellow")
    T2.draw(win)
    labelT2 = Text(Point(200, 200), '28')
    labelT2.draw(win)

    T3 = Circle(Point(260,200), 25) # set center and radius
    T3.setFill("yellow")
    T3.draw(win)
    labelT3 = Text(Point(260, 200), '30')
    labelT3.draw(win)

    T4 = Circle(Point(320,200), 25) # set center and radius
    T4.setFill("yellow")
    T4.draw(win)
    labelT4 = Text(Point(320, 200), '32')
    labelT4.draw(win)

    T5 = Circle(Point(380,200), 25) # set center and radius
    T5.setFill("yellow")
    T5.draw(win)
    labelT5 = Text(Point(380, 200), '34')
    labelT5.draw(win)

def draw_humid_meter():
    #temperature
    H1 = Circle(Point(140,200), 25) # set center and radius
    H1.setFill("orange")
    H1.draw(win)
    labelH1 = Text(Point(140, 200), '75')
    labelH1.draw(win)

    H2 = Circle(Point(200,200), 25) # set center and radius
    H2.setFill("orange")
    H2.draw(win)
    labelH2 = Text(Point(200, 200), '80')
    labelH2.draw(win)

    H3 = Circle(Point(260,200), 25) # set center and radius
    H3.setFill("orange")
    H3.draw(win)
    labelH3 = Text(Point(260, 200), '85')
    labelH3.draw(win)

    H4 = Circle(Point(320,200), 25) # set center and radius
    H4.setFill("orange")
    H4.draw(win)
    labelH4 = Text(Point(320, 200), '90')
    labelH4.draw(win)

    H5 = Circle(Point(380,200), 25) # set center and radius
    H5.setFill("orange")
    H5.draw(win)
    labelH5 = Text(Point(380, 200), '95')
    labelH5.draw(win)

def refresh_temp_meter():
    #temperature
    T1 = Circle(Point(140,200), 25) # set center and radius
    T1.draw(win)
    labelT1 = Text(Point(140, 200), '26')
    labelT1.draw(win)
    if float(temperature) >= 25.00:
        T1.setFill("red")
    else:
        T1.setFill("yellow")

    T2 = Circle(Point(200,200), 25) # set center and radius
    T2.draw(win)
    labelT2 = Text(Point(200, 200), '28')
    labelT2.draw(win)
    if float(temperature) >= 28.00:
        T2.setFill("red")
    else:
        T2.setFill("yellow")


    T3 = Circle(Point(260,200), 25) # set center and radius
    T3.draw(win)
    labelT3 = Text(Point(260, 200), '30')
    labelT3.draw(win)
    if float(temperature) >= 30.00:
        T3.setFill("red")
    else:
        T3.setFill("yellow")


    T4 = Circle(Point(320,200), 25) # set center and radius
    T4.draw(win)
    labelT4 = Text(Point(320, 200), '32')
    labelT4.draw(win)
    if float(temperature) >= 32.00:
        T4.setFill("red")
    else:
        T4.setFill("yellow")


    T5 = Circle(Point(380,200), 25) # set center and radius
    T5.draw(win)
    labelT5 = Text(Point(380, 200), '34')
    labelT5.draw(win)
    if float(temperature) >= 34.00:
        T5.setFill("red")
    else:
        T5.setFill("yellow")

def refresh_humid_meter():
    #temperature
    H1 = Circle(Point(140,200), 25) # set center and
    H1.draw(win)
    labelH1 = Text(Point(140, 200), '75')
    labelH1.draw(win)
    if float(humidity) >= 75.00:
        H1.setFill("red")
    else:
        H1.setFill("yellow")

    H2 = Circle(Point(200,200), 25) # set center and
    H2.draw(win)
    labelH2 = Text(Point(200, 200), '80')
    labelH2.draw(win)
    if float(humidity) >= 80.00:
        H2.setFill("red")
    else:
        H2.setFill("yellow")

    H3 = Circle(Point(260,200), 25) # set center and radius
    H3.draw(win)
    labelH3 = Text(Point(260, 200), '85')
    labelH3.draw(win)
    if float(humidity) >= 85.00:
        H3.setFill("red")
    else:
        H3.setFill("yellow")

    H4 = Circle(Point(320,200), 25) # set center and radius
    H4.draw(win)
    labelH4 = Text(Point(320, 200), '90')
    labelH4.draw(win)
    if float(humidity) >= 90.00:
        H4.setFill("red")
    else:
        H4.setFill("yellow")

    H5 = Circle(Point(380,200), 25) # set center and radius
    H5.draw(win)
    labelH5 = Text(Point(380, 200), '95')
    labelH5.draw(win)
    if float(humidity) >= 95.00:
        H5.setFill("red")
    else:
        H5.setFill("yellow")


def button():

    temp_humid = Rectangle(Point(220, 240), Point(300, 260))
    temp_humid.setFill("green")
    temp_humid.draw(win)

    label = Text(Point(260, 250), 'Tmp/Hmd')
    label.draw(win)

    return temp_humid

def inside(pt, rect):
    #check if pt is inside rect

    lower_left = rect.getP1()  # p1 is lower left
    upper_right = rect.getP2()  # p2 is upper right

    return lower_left.getX() < pt.getX() < upper_right.getX() and lower_left.getY() < pt.getY() < upper_right.getY()


draw_temp_meter()

select_button = button()
text = Text(Point(100, 100), "Temp")
text.draw(win)

choice = 0 # 0 - temperature, 1 - humidity

# from Arduino UNO values
temp_choice = b'\x0A'
humid_choice = b'\x0B'

while True:

    #Send to Arduino what sensor reading we want
    click = win.checkMouse()

    if click is None:
        pass

    elif inside(click, select_button):
        choice = choice ^ 1
        if choice == 0:
            ser.write(temp_choice)# send temp mode to UNO
            text.setText("Temperature")
            draw_temp_meter()
        elif choice == 1:
            ser.write(humid_choice)# send humdity mode to UNO
            text.setText("Humidity")
            draw_humid_meter()


    #Read the Sensor Reading from UNO and update GUI screen
    if choice == 0:
        while ser.in_waiting > 0:
            temperature = ser.readline()
            print(temperature)
            refresh_temp_meter()
    elif choice == 1:
        while ser.in_waiting > 0:
            humidity = ser.readline()
            print(humidity)
            refresh_humid_meter()

win.close()
The code starts importing both the graphics and serial libraries to the program. Ser and win are the objects created through these libraries.
Draw_temp_meter () and draw_humid_meter() initially draw circular temperature and humidity gauges with labels inside the win graphics object. The refresh_temp_meter() and refresh_humid_meter() draw out the colors required for each object to have correct readings.
A button() function lays out a button to choose between a temperature or a humidity reading. The inside() function cleverly determines if a point (pt) coincides with the defined rectangular box (rect).
The while loop checks if there is a click event. If there is, it is determined if the click coincides with the rectangular Tmp/Hmd chooser button. If it does, corresponding serial data is sent to the UNO. The UNO then outputs a temperature or humidity reading depending on what serial data it received.
Write Code for your UNO in C
Here is the code for your Arduino UNO board:
					// Example testing sketch for various DHT humidity/temperature sensors
// Written by ladyada, public domain

// REQUIRES the following Arduino libraries:
// - DHT Sensor Library: https://github.com/adafruit/DHT-sensor-library
// - Adafruit Unified Sensor Lib: https://github.com/adafruit/Adafruit_Sensor

#include "DHT.h"

#define DHTPIN 2     // Digital pin connected to the DHT sensor
// Feather HUZZAH ESP8266 note: use pins 3, 4, 5, 12, 13 or 14 --
// Pin 15 can work but DHT must be disconnected during program upload.

// Uncomment whatever type you're using!
#define DHTTYPE DHT11   // DHT 11
//#define DHTTYPE DHT22   // DHT 22  (AM2302), AM2321
//#define DHTTYPE DHT21   // DHT 21 (AM2301)

// Connect pin 1 (on the left) of the sensor to +5V
// NOTE: If using a board with 3.3V logic like an Arduino Due connect pin 1
// to 3.3V instead of 5V!
// Connect pin 2 of the sensor to whatever your DHTPIN is
// Connect pin 3 (on the right) of the sensor to GROUND (if your sensor has 3 pins)
// Connect pin 4 (on the right) of the sensor to GROUND and leave the pin 3 EMPTY (if your sensor has 4 pins)
// Connect a 10K resistor from pin 2 (data) to pin 1 (power) of the sensor

// Initialize DHT sensor.
// Note that older versions of this library took an optional third parameter to
// tweak the timings for faster processors.  This parameter is no longer needed
// as the current DHT reading algorithm adjusts itself to work on faster procs.
DHT dht(DHTPIN, DHTTYPE);

#define temp  0x0A
#define humid 0x0B

int incomingByte = 0x00;
int toggle_read = 0;


void setup() {
  Serial.begin(9600);
  //Serial.println(F("DHTxx test!"));
  //Serial.write(0x0A); // start

  dht.begin();
}

void loop() {
  // Wait a few seconds between measurements.
  delay(2000);

  // Reading temperature or humidity takes about 250 milliseconds!
  // Sensor readings may also be up to 2 seconds 'old' (its a very slow sensor)
  float h = dht.readHumidity();
  // Read temperature as Celsius (the default)
  float t = dht.readTemperature();
  // Read temperature as Fahrenheit (isFahrenheit = true)
  float f = dht.readTemperature(true);

  // Check if any reads failed and exit early (to try again).
  if (isnan(h) || isnan(t) || isnan(f)) {
    //Serial.println(F("Failed to read from DHT sensor!"));
    return;
  }

  // Compute heat index in Fahrenheit (the default)
  float hif = dht.computeHeatIndex(f, h);
  // Compute heat index in Celsius (isFahreheit = false)
  float hic = dht.computeHeatIndex(t, h, false);

  // check serial port to read incoming byte
  if (Serial.available() > 0) {

    incomingByte = Serial.read();

    switch (incomingByte){
      case temp:
        toggle_read = temp;
        break;

      case humid:
        toggle_read = humid;
        break;

      default:
        // do nothing
        break;
    }
  }

  // output desired sensor data to Python
  switch (toggle_read) {

    case temp:
      Serial.print(t);
      break;

    case humid:
      Serial.print(h);
      break;

    default:
      break;
  }

  // Serial.print(F("Humidity: "));
  // Serial.print(h);
  // Serial.print(F("%  Temperature: "));
  // Serial.print(t);
  // Serial.print(F("°C "));
  // Serial.print(f);
  // Serial.print(F("°F  Heat index: "));
  // Serial.print(hic);
  // Serial.print(F("°C "));
  // Serial.print(hif);
  // Serial.println(F("°F"));
}
The code is a modified DHTTester program from the Examples library. What it does is receive serial data from Python. The UNO determines if the Python GUI needs a temperature or humidity reading from this data.
Project in Action
SHOP THIS PROJECT
-
Sale!


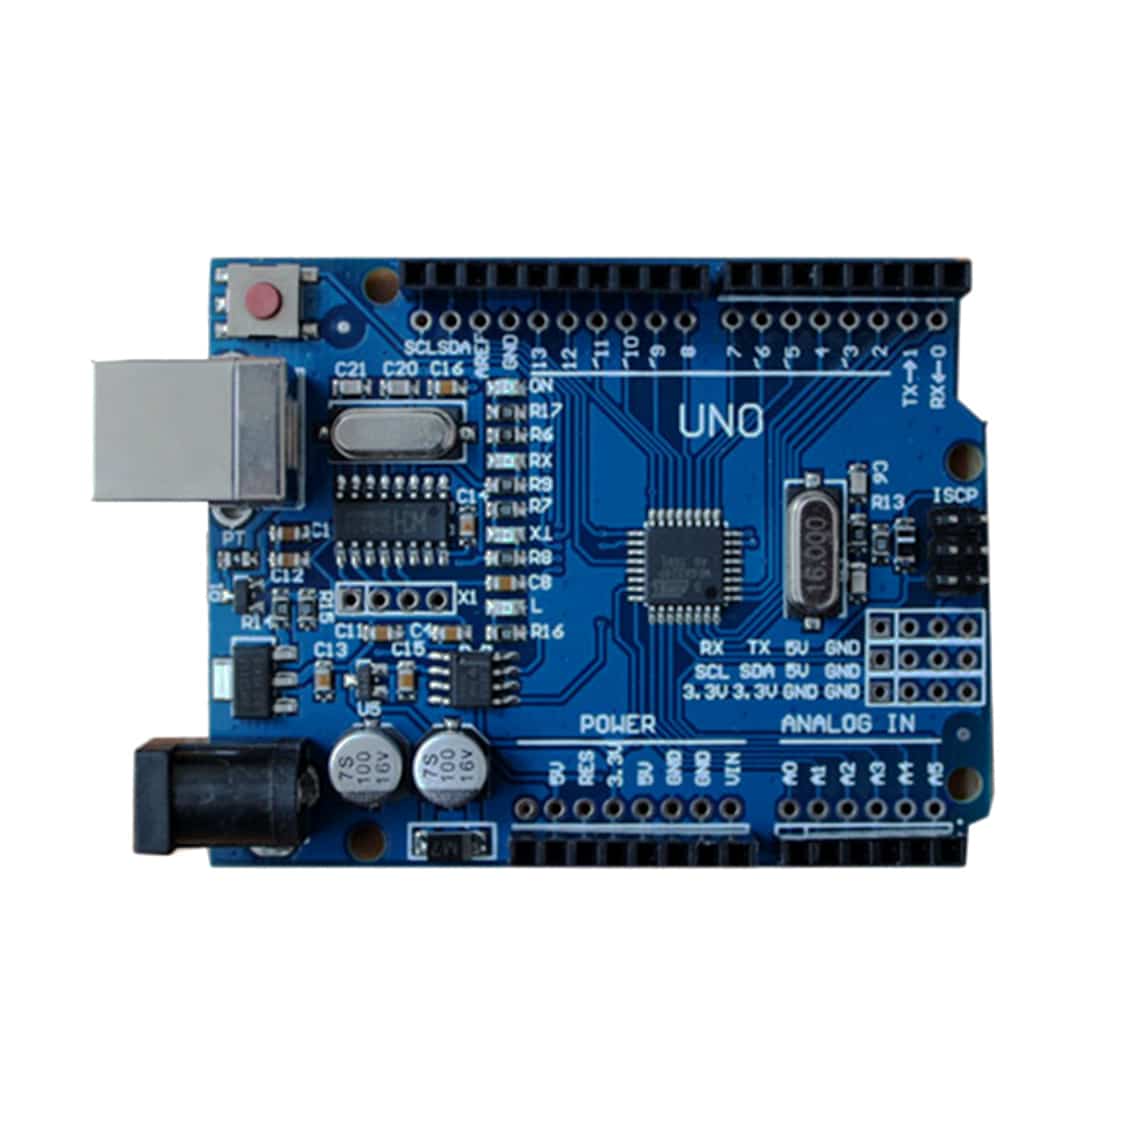
Arduino UNO CH340 MEGA328P Development Board with USB Cable – Compatible
$23.95Original price was: $23.95.$22.95Current price is: $22.95. Add to cart