Phipps Electronics

Order within the next 

FREE SHIPPING OVER $199

50,000+ ORDERS

WORLDWIDE SHIPPING

SSL SECURED

Introduction to NodeMCU

Contents

NodeMCU is exactly something that the following image indicates. NodeMCU is like a programmable Arduino board, but a lot more than just that. It has inbuilt Wifi and a lot more which I will be covering here and also show you all how to program it.

WHAT IS NODEMCU?

NodeMCU is an open source IoT platform. It includes firmware which runs on the ESP8266 Wi-Fi SoC from Espressif Systems, and hardware which is based on the ESP-12 module. The term “NodeMCU” by default refers to the firmware rather than the development kits. The firmware uses the Lua scripting language. It is based on the eLua project and built on the Espressif Non-OS SDK for ESP8266. It uses many open source projects, such as lua-cjson, and spiffs.

ARDUINO UNO VS NODEMCU

SpecificationNodeMCUArduino UNO
WiFiYesNo
RAM128KB2KB
ROM4MB32KB
ConnectorMicro USBUSB Type B
Operating Voltage3.3V5V
Max Current12mA40mA
Clock Speed80MHz16MHz
GPIO Pins1416
Analog Pins16
PWM96
Dimensions4.8cm x 2.5cm6.6cm x 5.3cm

NodeMCU Overview and Pinout

A NodeMCU board looks like the following:

Below is the pinout of the NodeMCU board.

Programming the NodeMCU Board

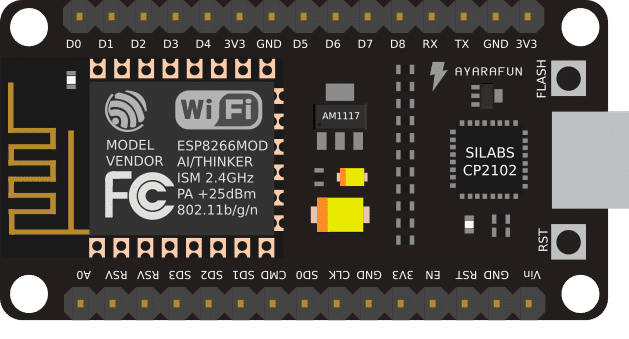
  1. Another great thing about the NodeMCU is that it can easily be programmed through the Arduino IDE. So, to get started with the awesome NodeMCU board, first get yourself one ofcourse.
  2. Next, you will need the Arduino IDE. Download it from here if you do not have it already.
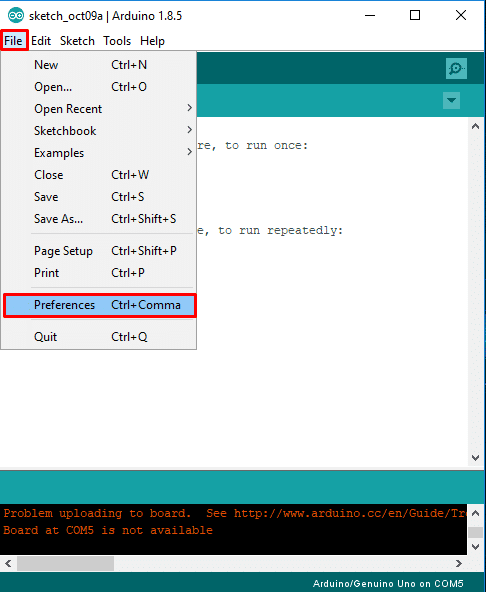
    (If you already have the Arduino IDE, make sure it is equal or above version 1.8)
  3. Now, open the Arduino IDE and navigate to File > Preferences

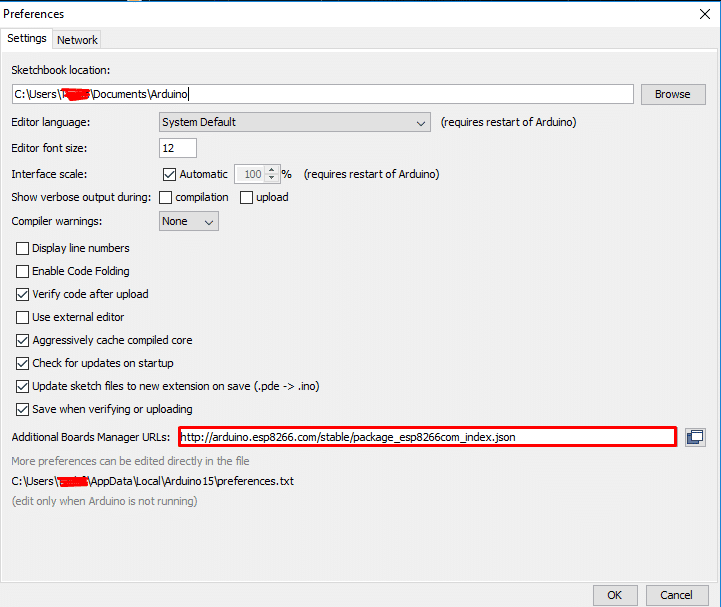
    A window like below should appear. Now, copy and paste this link in the red marked box shown in the image.

    The link: http://arduino.esp8266.com/stable/package_esp8266com_index.json

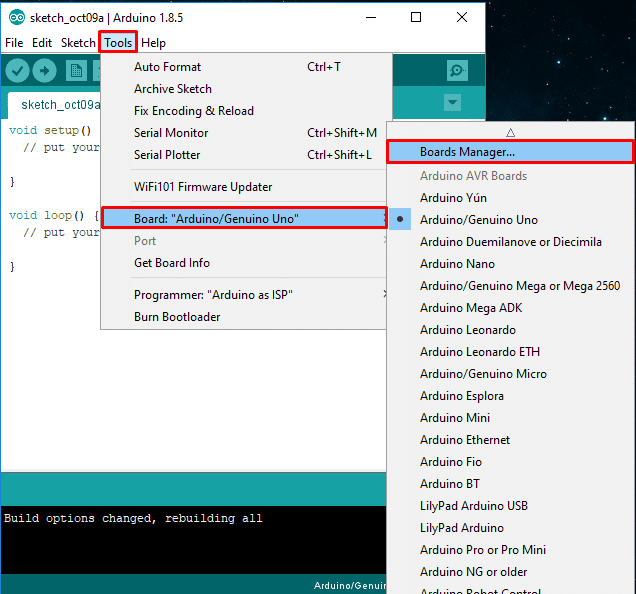
  4. After the link has been put there, navigate to Tools > Boards > Board Manager

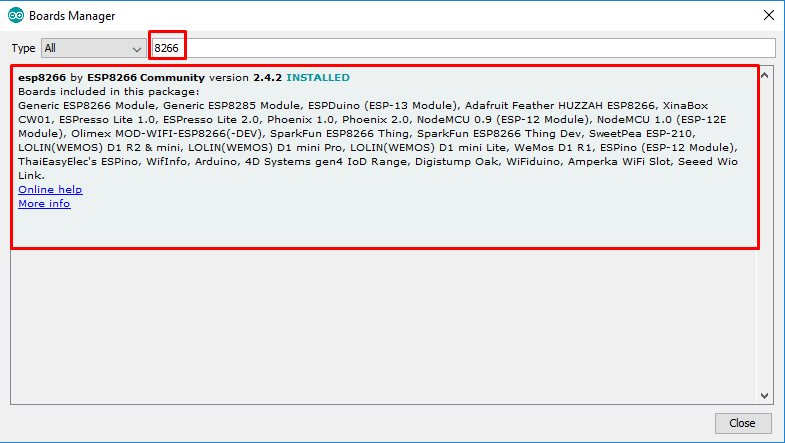
    Type and search for “8266” and install the ESP8266 package.

    It may take a little time to download and install. But after that has been done, you are ready to also done with your NodeMCU programming environment set up!
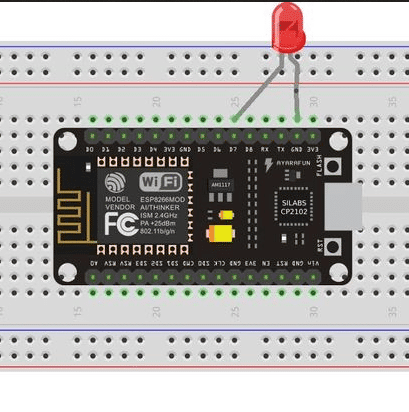
    Now, let’s test it!

Programming the NodeMCU: LED Blink Project

You program the NodeMCU exactly like Arduino. The same syntax does the same basic things.

So, first of all, implement the following circuit:

Next, connect the MicroUSB cable and connect your NodeMCU to your computer. You should see your board blinking a blue light a few times. That is normal and unlike Arduino, it doesn’t have any indicator to show if it is being supplied power.

Now, from your Arduino IDE, navigate to Tools > Board and select “NodeMCU 0.9(ESP – 12 Module)”.

After that has been down, it is time to write code and upload to your board!

				
					void setup() {
  pinMode(D7, OUTPUT);     // Initialize the D7 pin as an output
}

void loop() {
  digitalWrite(D7, HIGH);   
  delay(3000);                      // Wait for 3 seconds

  digitalWrite(D7, LOW);  // Turn the LED off by making the voltage LOW
  delay(1000);                    // Wait for 1 seconds
}


Now, click upload & wait for the code to upload. You should see the blue LED blinking while the code is being uploaded.

Now, after the codes has been uploaded, you should see the LED blinking.

SUBSCRIBE FOR NEW POST ALERTS

Subscribe to be the first to know when we publish a new article!
List Subscriptions(Required)

POPULAR POSTS

Scroll to Top