USB Relay control board
Controlling the USB Relay:
Download:
To control the relay board, you can download relevant files here: USBRelayExtLib-master
Command Test Application:
Filename: CommandApp_USBRelay.exe
The CommandApp_USBRelay.exe is used to control the functionality of the USB relay via the command line. To use this application, it needs to be called inside the command prompt (cmd).
The GUI application needs to be closed when using CommandApp_USBRelay.exe. Otherwise, it will not work.
To control through Command Prompt, the line is: USBRelay(serial,oc,chan)
- Serial: The serial number of the board.
- Oc: This the operation of the relay, the options are: Open or Close. Open activates the relay, Close disconnects the relay.
- Chan: This is the relay module on the board you wish to control.
Example: USBRelay(tk421,open,2)
Success Codes:
- If the command sent to the board is successful, a code of 0 will be returned.
- If the command sent to the board is unsuccessful, a code of 1 will be returned.
Serial Number:
To retrieve the serial number of the board, open the application: GuiApp_English.exe
The file can be found in the TestApp directory.
Directions:
- Connect the USB Relay board to the computer
- Open GuiApp_English.exe application.
- Click the button “Find device”.
- The connected devices will be displayed In the drop-down field, and this is where you will find the serial number.
Test Application with Graphical User Interface:
Filename: GuiApp_English.exe
The GuiApp_English.exe application is used to control the functionality of the USB relay via a graphical user interface. The GUI allows for easy use of the relay by allowing for simple button clicks to control the relay.
To control the relay via the GUI:
- Connect the USB Relay board to the computer.
- Open the GuiApp_English.exe application.
- Click the “Find device” button.
- Connected boards will be displayed in the drop downfield.
- Select the board you wish to control, and click the “open device” button.
- The board is now selected, and can be used via the program to control it.
Using with C++:
The download file contains a folder called “usb_relay_dll” these files are used to integrate the functionality of the USB relay in your own custom application.
The folder contains the following files:
- usb_relay_device.dll
- usb_relay_device.h
- usb_relay_device.lib
Note: the below information is from another document, and we can’t provide support in troubleshooting integration issues with your custom application.
How to use in Visual Studio:
- Create a new C++ project.
- In the stdfax.h file add the following lines:
- #include “usb_relay_device.h”
- #pragma comment(lib, “usb_relay_device.lib”)
- Copy the usb_relay_device.dll file to the directory used for your application, such as the “Release” or “Debug” directory.
Calling the board:
- Call usb_relay_init() to init the lib.
- Call usb_relay_device_enumerate() to reteive the deveices connected to the computer.
- Call usb_relay_device_open() open the desired board / device.
Controlling the board:
- Call usb_relay_device_open_one_relay_channel() to open one relay
- Call usb_relay_device_open_all_relay_channel() to open all relays
- Call usb_relay_device_close_relay_channe() top close one relay
- Call usb_relay_device_close_all_relay_channel() to close all relays
Linux Drivers:
Linux drivers are available for you to check at GitHub:
darrylb123/usbrelay: Control usb relay
-
Product on sale
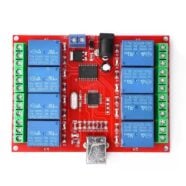
 8 Channel 5V Low Level USB Relay ModuleOriginal price was: $40.95.$34.95Current price is: $34.95.
 -
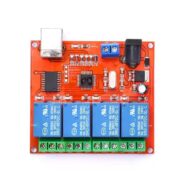
4 Channel 5V Low Level USB Relay Module$30.95
-
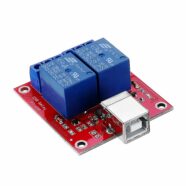
2 Channel 5V Low Level USB Relay Module$20.95