Introduction:
In this tutorial, we will learn about the KY-015 module, what is a DHT11 sensor and we will build a simple project to read the ambient temperature and humidity sensed by the KY-015 module using an Arduino.
Temperature and Humidity Sensor KY-015:
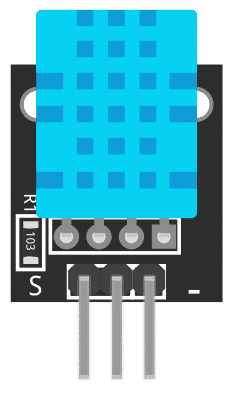
The KY-015 Module will be our main component for this tutorial. This module has a DHT11 sensor and a 1K-ohm resistor mounted on a breakout board. Figure 1 shows the module as seen in fritzing.
Pin Out:
The KY-015 module has three pins.
| Component Pin | Arduino Uno board Pin |
|---|---|
| (-) | GND |
| middle | +5V |
| S | Signal |
What is DHT11?
DHT11 is a digital humidity and temperature sensor. It’s a basic and very cheap sensor suitable for simple projects and hobbyists. The DHT11 uses a thermistor and capacitive humidity sensor to measure the ambient temperature and humidity.
Project:
Arduino Simple Temperature and Humidity Reader:
After learning about the KY-015 module and the DHT11, it is now time to build a project using the module. Our project will read ambient temperature and humidity from the KY-015 module and display it on the serial monitor.
Components:
For this project, we need the following components:
- Arduino Uno board (1 pc.)
- KY-015 Temperature and Humidity Sensor (1 pc.)
- Jumper wires
Wiring Diagram:
Figure 2 shows the connection between the Arduino Uno and the KY-015 Temperature and Humidity Sensor.
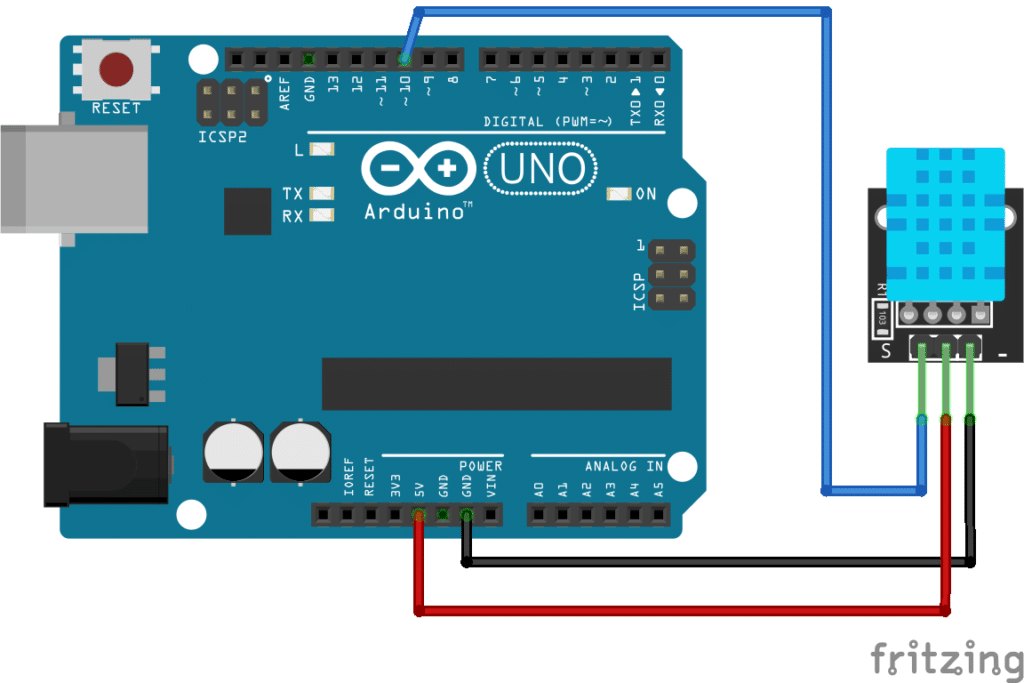
The KY-015 module pins are connected to the Arduino Uno board as follows:
| Component Pin | Arduino Uno board Pin |
|---|---|
| (-) | GND |
| middle | +5V |
| S | 10 |
Code:
Below is the Arduino sketch for our project. I have added comments to explain important parts of the code. Save the code as KY-015.ino and upload it to your Arduino board.
					// Arduino and KY-015 module
byte rcvByte[5];  // array to store temp. and humidity values
// function to get bit response from dht11
byte get_value()
{
  byte i = 0;
  byte value = 0;
  for (i = 0; i < 8; i++) {
    while (digitalRead(10) == LOW); // wait for pin state to be HIGH
    delayMicroseconds(30);          // wait 30 microSeconds
    if (digitalRead(10) == HIGH)
      value |= (1 << (8 - i));      // save bit value if pin 10 is HIGH
    while (digitalRead(10) == HIGH); // wait for pin state to be LOW
  }
  return value;
}
// function to get temperature and humidity values from dht11
void dht()
{
  digitalWrite(10, LOW);  // set pin LOW to start communication with module
  delay(30);              // wait 30 milliSeconds
  digitalWrite(10, HIGH); // set pin HIGH
  delayMicroseconds(40);  // wait 40 microSeconds
  pinMode(10, INPUT);     // change pin 10 mode to input
  while (digitalRead(10) == HIGH);    // wait for pin to be LOW
  delayMicroseconds(80);  // wait for 80 microSeconds
  if (digitalRead(10) == LOW)
    delayMicroseconds(80); // wait for 80 microSeconds
  for (int i = 0; i < 5; i++) // receive temperature and humidity values
    rcvByte[i] = get_value();
  pinMode(10, OUTPUT);    // change pin 10 mode to ouptut
  digitalWrite(10, HIGH); // set pin 10 to HIGH
}
void setup()
{
  Serial.begin(9600); // initialize serial interface
  pinMode(10, OUTPUT);  // set pin 10 mode to output
}
void loop()
{
  // get data from module
  dht();
  // send data to serial
  Serial.print("Humdity = ");
  Serial.print(rcvByte[0], DEC);
  Serial.print(".");
  Serial.print(rcvByte[1], DEC);
  Serial.println("%");
  Serial.print("Temperature = ");
  Serial.print(rcvByte[2], DEC);
  Serial.print(".");
  Serial.print(rcvByte[3], DEC);
  Serial.print(" degC");
  // check if there is tranmission error by calculating checksum and compare to rcvByte[4]
  byte checksum = rcvByte[0] + rcvByte[1] + rcvByte[2] + rcvByte[3];
  if (rcvByte[4] != checksum)
    Serial.println(" << Checksum Error!");
  else
    Serial.println(" << OK");
  delay(1000);
}
Project Test:
Apply power to your Arduino Uno board and open the Serial Monitor in the Arduino IDE. Arduino will request temperature and humidity values from the KY-015 module and display it to the serial monitor.